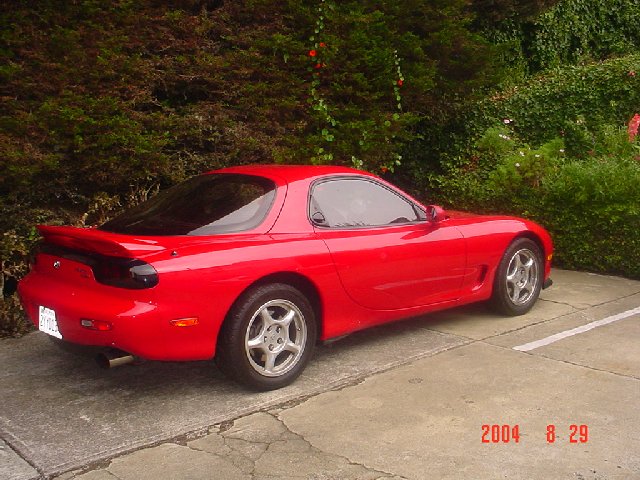
Here is my new toy! Ain't she pretty? ;-) It's a 1993 Mazda RX-7 twin turbo. These cars are notorious for breaking down, but I've found that if you take care of them, they will take care of you. This is an R1 model that includes: dual oil-coolers, front/rear spoilers, suede seats, front strut bar, and a stiffer suspension. I spent almost the entire first month wrenching on the car. I did a lot of reliability mods (silicon hose upgrade, cooling system upgrade, etc) and some performance mods, too. This car is insanely fast and super fun to drive. Ultimately though, I think the CRX will win in the acceleration department. That is the goal. :-)
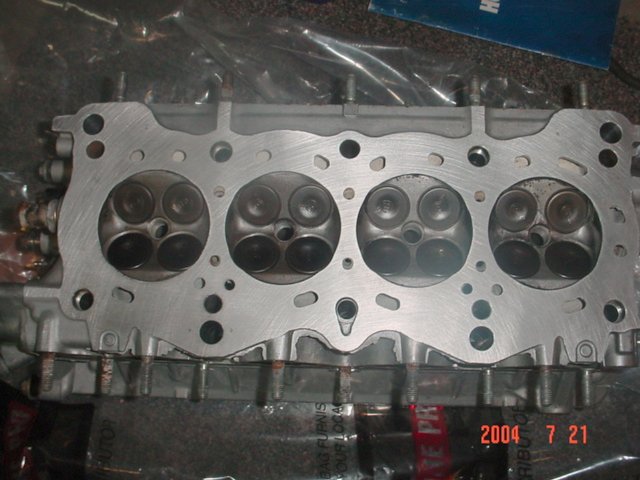
Uh oh...trouble! I left work one day and everything seemed fine. The car ran good and had plenty of power. When I got home and pulled into my driveway, I noticed that it was misfiring. I got out and pulled each plug wire (1 at a time) and found that cylinder #3 was not firing. Crap! A compression test showed 180 psi on every cylinder, so I thought that the headgasket was good. Additionally, when I checked #3, releasing the cylinder pressure resulted in coolant shooting out of the compression tester. After much reluctance, I decided to pull the head. I wanted to check on the condition of the block posts that I had installed. This was a good time to do it. I pulled the head off and this is what I saw. Ugh. As you can see, the headgasket was not sealing the #3 cylinder. >:-( I used a Cometic .040" MLS gasket in this build. After installing mine, I found out that some other A1/ZC owners have had trouble with this gasket. I thought that I was gonna get lucky, but I guess not. I think the MLS gasket is a better design, but I went back to the OEM Honda graphite/steel gasket because I know it will work. It may not be as strong, but I know it won't leak! The block posts look great, too.
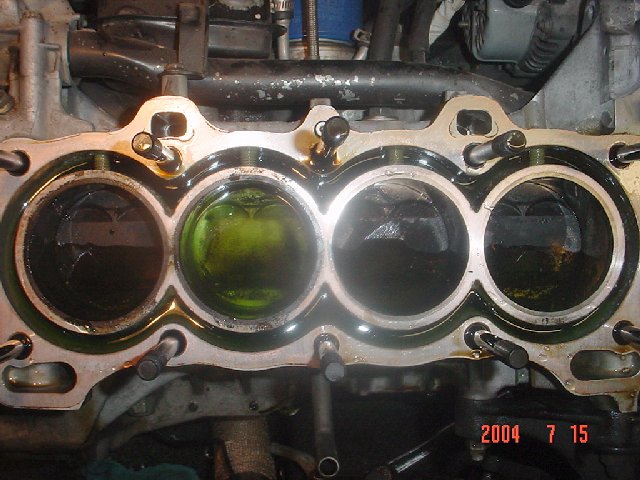
Here's a look at the head with the gasket still on it. I didn't examine the gasket too closely, but it looks to me like it lost the seal between cylinders #3 and #4. Looking at the color of the exhaust valves, you can see that water had gotten into those 2 cylinders.
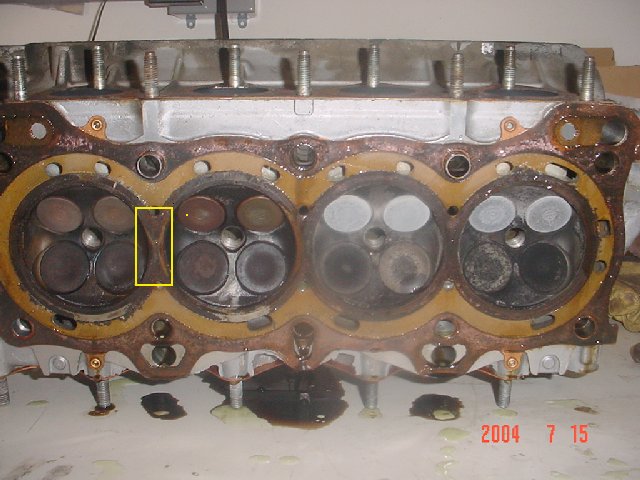
I used a straight-edge to check the deck for straightness. It was fine. I
took the head down to the machine shop that has done all of my work so far
(Performance Motors in Livermore, CA) and had it checked. The head was not
warped. I also had it pressure tested. It was ok there, too. This is the
head, ready to be reinstalled. I love working with clean parts.
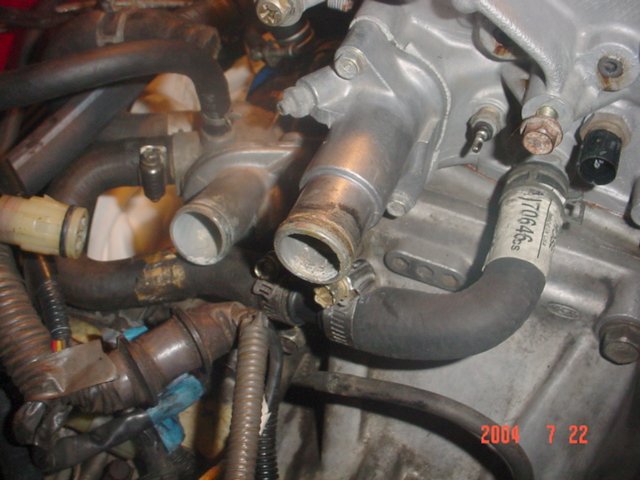
This is my temporary heater-bypass. There is a .125" restrictor inside
it to prevent hot coolant from must pouring straight back into the head. I
plan to hook the heater back up since I'll need it in the winter time and
it can also be an added safety margin if the engine starts running too hot. I
could have capped these items off, but I didn't want anything to rust.
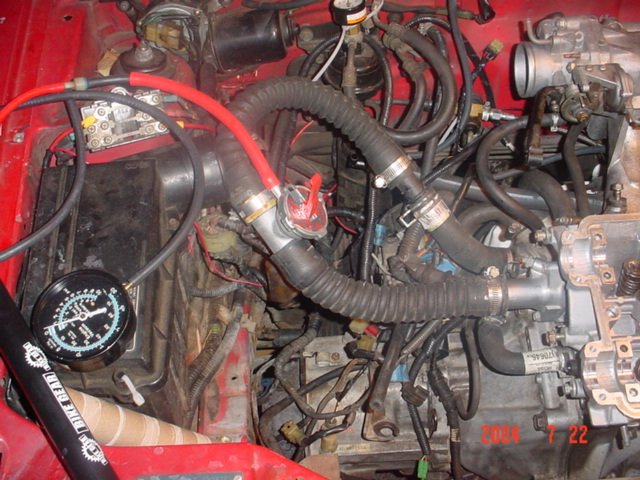
I wanted to be certain that the new gasket was sealing, so once the head
was reinstalled, I pressurized it while it had some coolant in it. No
coolant leaked into any of the cylinders. Phew!
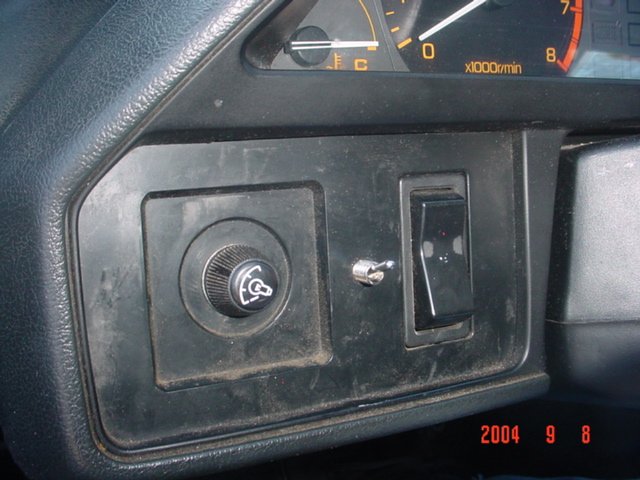
This has been in my car for awhile, but I had never showed it. This little
switch connects to a relay that operates the radiator fan. Relying on the
factory thermoswitch makes me kind of nervous. I bought a 30 amp automotive
relay from Radio Shack and hooked it up to the fan motor. The relay gets 12v
from the fuse panel. This toggle switch activates the relay and starts the
fan. I don't really use the fan much except for in stop-n-go traffic. You
might remember that I had 2 gauges mounted here before. I had to remove them
before seeing the ref. Those gauges will probably get reinstalled elsewhere.
The same is true for the ones on the climate-control side of the steering wheel.
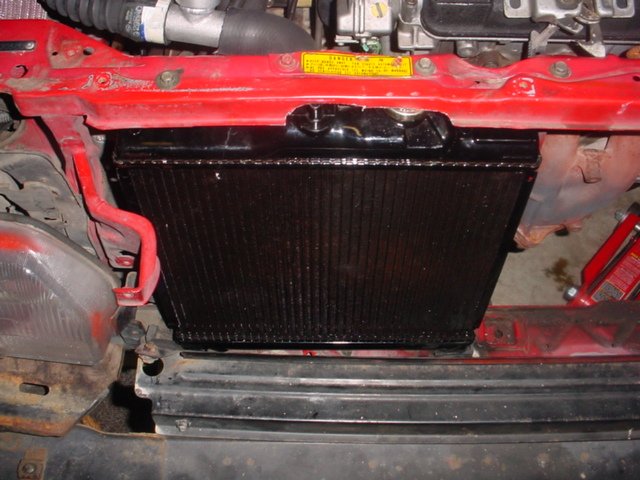
This is the Koyo half-width double-thick radiator that was in the car. Using
this radiator has been kind of a hassle, so I opted to yank it out and install
a new OEM CRX radiator. The CRX radiator isn't as thick, but it's about 50%
wider. It does give me less turbo clearance, but that shouldn't be a problem
for what I have in mind (more on that later).
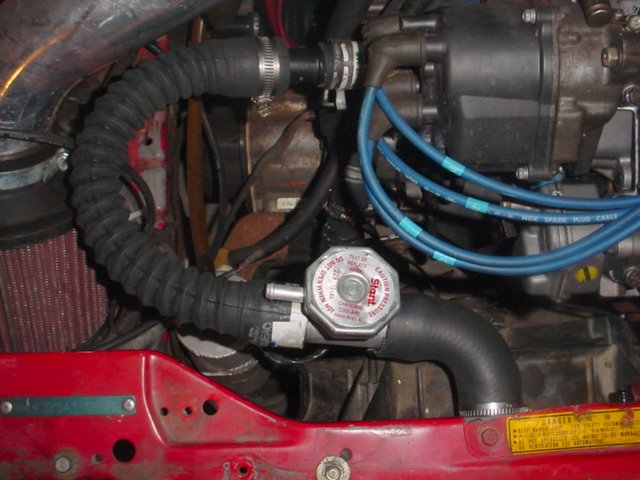
Using the Koyo radiator required the use of a remote filler neck since the
radiator cap was not accessible. This meant plumbing 2 overflow lines. The
setup is doable, but I don't really like the look of it or having to deal
with 2 caps. I may go back to this setup...it depends on whether I need
more turbo clearance.
She's been back on the road for about 3000 trouble-free miles. You can see
the OEM style radiator cap in the bottom-left of this picture.
I've got big plans for the next few months! Stay tuned...