
2 new gaskets and 3 new seals cost more than I paid for the tranny! That's ok though. The last thing I'd want is to put this thing back together and have it leak.

Here's the clutch-side case after I pressed in the new diff seal and mainshaft seal.

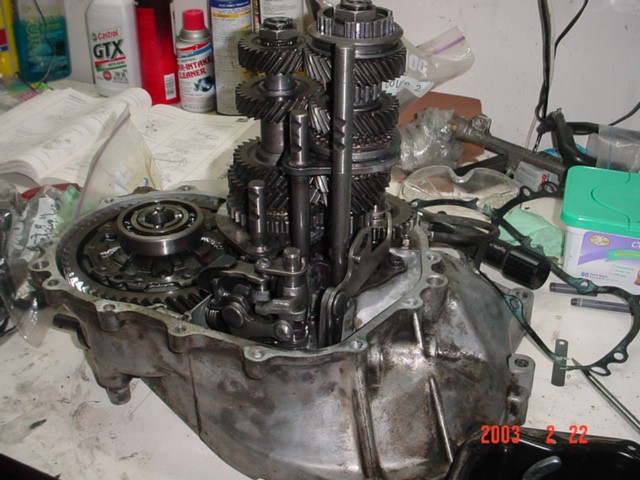
After that, the differential, mainshaft and countershaft were put in. Later, I had to raise the shafts up a little to get the shift forks in, but it worked out ok.

Almost there! The reverse idler gear, shift selector, and 1/2 and 3/4 shift forks were installed.
Here's the new gasket with some Hondabond on both case halves. The Hondabond will seal any imperfections in the gasket. The dowel pins do a good job of holding the gasket still while the other case half is lowered down.

The case halves are together now. All that's left is to put the 5th gear assemblies in before the cover can be installed.

Honda makes a special tool that holds the mainshaft in place while you torque the countershaft and mainshaft nuts down to 65 ft-lbs. I didn't have this tool and I didn't feel like buying it, so I used this trick. Who needs a special tool when you've got a vise, a piece of an old timing belt, and 2 bricks? It worked like a champ.

The tranny is all done. The last thing I did was use this screwdriver to shift through the gears and make sure everything worked.
