
My first thought was "I'll worry about it later.", but I decided to do a little bit of investigating. The timing belt cover showed that the oil didn't appear to be coming from the headgasket. Since the engine had been heat-cycled 10 times, I went ahead and pulled the cams out in order to retorque the head studs (they stretch when used for the 1st time).

Because of the location of the leak, I began to get worried that the oil would get onto the timing belt. That could have disastrous consequences, so I decided to work on it. The oil appeared to be coming from between the oil pan and the block, so I replaced the oil pan gasket. Changing the pan gasket isn't super easy because the intermediate axle blocks access to 2 of the pan bolts. After replacing the gasket, I ran the car for about 100 miles. As you can see, the leak was not fixed! ARRRGGH.

Since I was having trouble pinpointing the source of the leak, I decided to use a trick that I found on the internet. Basically, you spray all suspected leak locations with some athlete's foot powder. If that location is the source of the leak, the powder will turn into a chalky syrup. This is the headgasket after being sprayed and run for about 10 miles. It was not the source of the leak (phew!).
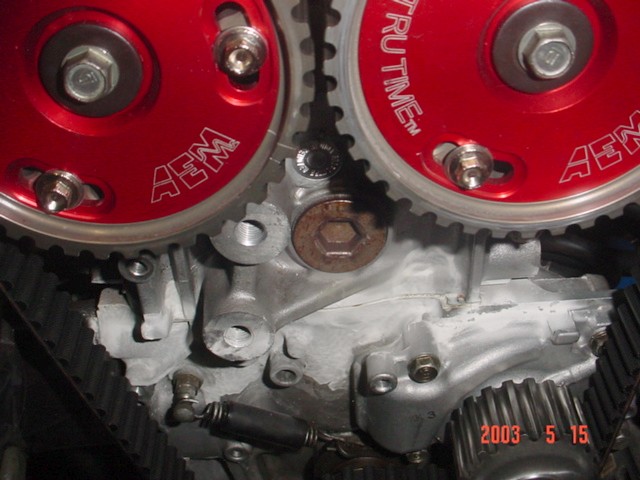
It appears that we have a winner! The only place that the powder turned to syrup was at the point where the oil pump met the block. It baffled me that it could be leaking here because the pump was brand new and I made sure that everything was clean before installation.

I began to get suspicious that I was possibly sent the wrong oil pump. During the installation, I remembered that the new pump's body was shaped a little different along the top. I checked the parts fiche on Carland Acura's web site (where I got the pump) and it showed that all 86-89 Integra pumps were the same. I looked at the box that the pump came in and got the part number from it.

Further investigation showed that I was in fact sent the wrong pump! ARRRGH.

I called Carland Acura and expressed my disappointment and frustration over the situation. They agreed to overnight me the correct pump at no cost. I was very happy that they owned up to their mistake. Now it was time to tear it all apart again. Here's a look at the D16A6 pickup tube that I had to use since I used the D16A6 oil pan (covered in Engine Assembly: Part 7). It held up fine.

Here's a look at the 88-89 pump fresh off of the engine. As you can see, the Hondabond wasn't even compressed on a large portion of the upper section of the pump body. It's a wonder that it even sealed at all!

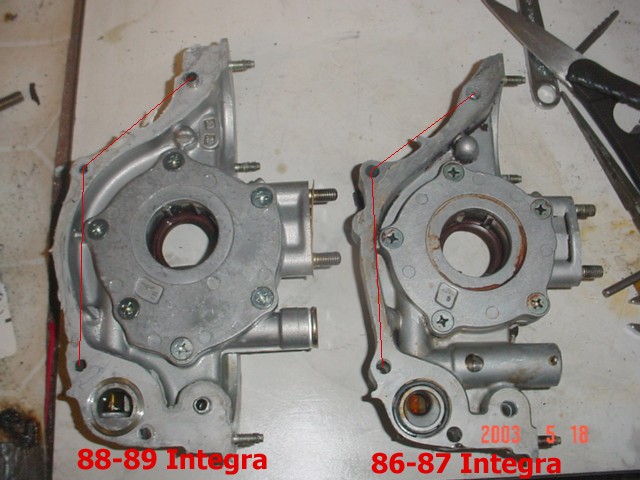
Here's a comparison between the 88-89 pump and the original 86-87 pump that came on the engine. Their outer shapes look identical at first glance, but they are not. The 88-89 pump bolts right on, but the red lines make it easy to see why the 88-89 pump did not seal correctly.
I should have the new pump very soon. After I install it, I'll be back on the road again and ready to put the remaining 750 break-in miles on the engine.